Rustic No-Knead Artisan Bread
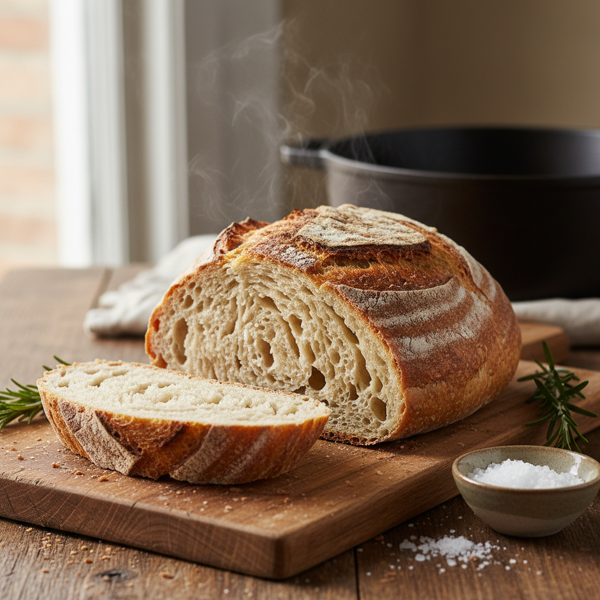
This Rustic No-Knead Artisan Bread is a game changer for home bakers! Inspired by the traditional methods used in artisan bakeries, this easy-to-follow recipe yields a crusty, golden brown loaf with a chewy interior and a delightful flavor. Thanks to the Dutch oven method, the steam trapped inside creates a crust that rivals that of a brick oven. Perfect for sandwiches, toast, or simply with a pat of butter, this bread is sure to impress your family and friends. With minimal effort, you can enjoy the satisfaction of baking your own bread, enhancing your meals with a touch of homemade goodness. Ideal for beginner bakers or anyone looking to add a little homemade magic to their meal prep!
N/A
Servings
120
Calories
5
Ingredients
Ingredients
active dry yeast
1/4 teaspoon (dissolved in warm water)
warm water
1 1/2 cups (at approx. 110°F (43°C))
all-purpose flour
3 cups (plus more for dusting)
salt
1 1/2 teaspoons (added to flour mixture)
cornmeal or wheat bran
for dusting (for the towel and pot)
Instructions
1
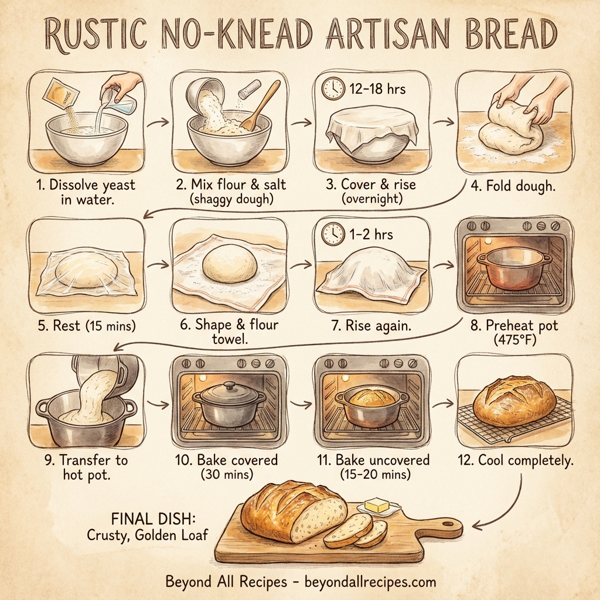
In a large mixing bowl, dissolve the active dry yeast in the warm water. Let it sit for a few minutes until foamy.
2
Add the flour and salt to the yeast mixture, stirring with a wooden spoon or spatula until just combined. The dough should appear shaggy and sticky.
3
Cover the bowl tightly with plastic wrap or a clean kitchen towel. Allow the dough to rest at room temperature for at least 8 hours, or preferably 12 to 18 hours, until the surface is dotted with bubbles.
4
Once the dough has risen, lightly flour a clean work surface and carefully turn the dough onto it. Sprinkle a little more flour over the top and fold the dough over itself a couple of times.
5
Cover the dough loosely with plastic wrap and let it rest for 15 minutes.
6
Using just enough flour to prevent sticking, gently shape the dough into a ball. Generously flour a clean dish towel with flour, cornmeal, or wheat bran.
7
Place the dough seam-side down onto the towel and dust the top with more flour. Cover with another towel and let it rise for another 1 to 2 hours, or until doubled in size.
8
About 20 minutes before the dough is ready, preheat your oven to 475 degrees Fahrenheit (245 degrees Celsius). Place a 6- to 8-quart heavy covered pot (cast iron, enamel, Pyrex, or ceramic) in the oven to heat.
9
When the dough has risen adequately, carefully remove the hot pot from the oven. Remove the lid, and using the towel, gently turn the dough seam-side up into the hot pot.
10
Give the pot a gentle shake to help distribute the dough evenly. Cover with the lid and bake for 30 minutes.
11
After 30 minutes, remove the lid and continue baking for an additional 15 to 20 minutes, or until the loaf is a deep golden brown and crusty.
12
Carefully remove the bread from the pot and let it cool on a rack for at least 1 hour before slicing to ensure the perfect texture.
Nutrition Information
0.6g
Fat
24g
Carbs
3g
Protein
1.2g
Fiber
Frequently Asked Questions
Frequently Asked Questions
What is Rustic No-Knead Artisan Bread?
It is a simple, home-baked bread with a crusty, golden brown exterior and a chewy interior, inspired by traditional artisan bakery methods.
How much active dry yeast is required?
The recipe calls for 1/4 teaspoon of active dry yeast.
What temperature should the warm water be?
The water should be approximately 110 degrees Fahrenheit (43 degrees Celsius).
How much flour is used in this recipe?
You will need 3 cups of all-purpose flour, plus additional for dusting.
What is the salt measurement?
The recipe requires 1 1/2 teaspoons of salt.
What can be used for dusting the towel and pot?
You can use flour, cornmeal, or wheat bran for dusting.
What is the first step in the instructions?
Dissolve the active dry yeast in warm water and let it sit for a few minutes until foamy.
What should the dough look like after mixing?
The dough should appear shaggy and sticky after stirring the flour and salt into the yeast mixture.
How long should the dough rest at room temperature during the first rise?
The dough should rest for at least 8 hours, or preferably 12 to 18 hours.
What indicates the dough has finished its first rise?
The surface of the dough will be dotted with bubbles.
How should the dough be handled after the first rise?
Turn it onto a floured surface, sprinkle with more flour, and fold it over itself a couple of times.
How long is the intermediate rest after folding?
The dough should rest loosely covered for 15 minutes.
How is the dough shaped?
Gently shape the dough into a ball using just enough flour to prevent sticking.
How long is the final rise?
The final rise takes another 1 to 2 hours, or until the dough has doubled in size.
When should the oven be preheated?
Preheat the oven about 20 minutes before the dough is ready after its final rise.
What is the target oven temperature?
The oven should be preheated to 475 degrees Fahrenheit (245 degrees Celsius).
What size pot is best for this recipe?
A 6- to 8-quart heavy covered pot is recommended.
What materials are suitable for the baking pot?
You can use cast iron, enamel, Pyrex, or ceramic pots.
How do you transfer the dough to the pot?
Gently turn the dough seam-side up into the hot pot using the towel.
How long is the bread baked with the lid on?
Bake the bread covered with a lid for 30 minutes.
How long is the bread baked without the lid?
Remove the lid and bake for an additional 15 to 20 minutes.
Why should the bread cool before slicing?
Cooling for at least 1 hour ensures the perfect texture of the interior.
How many calories are in a serving?
There are 120 calories per serving.
What is the fat content per serving?
The bread contains 0.6g of fat per serving.
How many carbohydrates are in a serving?
Each serving contains 24g of carbohydrates.
What is the protein content per serving?
There are 3g of protein per serving.
How much fiber is in the bread?
Each serving provides 1.2g of fiber.
How many total ingredients are needed?
The recipe uses 5 ingredients.
Why is a Dutch oven used?
The Dutch oven traps steam inside, which creates a crust that rivals brick oven baking.
Is this recipe suitable for beginners?
Yes, it is ideal for beginner bakers as it requires minimal effort and no kneading.